
Hi programming enthusiasts! Today I will show you how to install InteliJ Idea, add Gradle support and how to use it. Enjoy your learning!
What is Gradle and why should I use it?
Gradle is (just like Maven) a builing automation tool allows us to build any type of software, easily manage dependencies and create building scripts using Gradle DSL (Groovy or Kotlin – I will be using Groovy here). It makes the dependency management quite an easy and straightforward process.
What am I going to show you?
I will create a sample Gradle project, add some dependencies describing their type (and Gradle DSL) and build some cool custom building script showing at least some of the power of the tool.
Let’s begin! Open your InteliJ instance and go to File > New > Project

Choose Gradle and Java app.
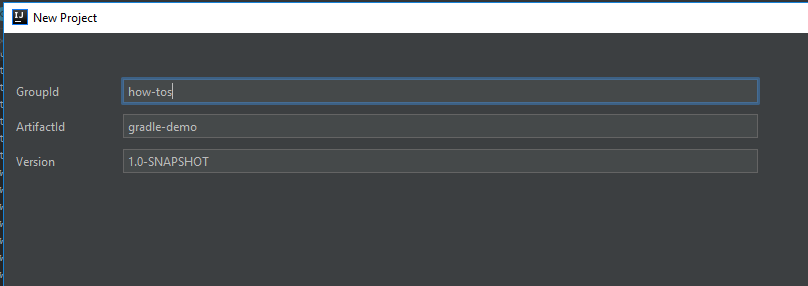
Add nape of the group and artifact for your package (anything you want as it’s a demo :)).
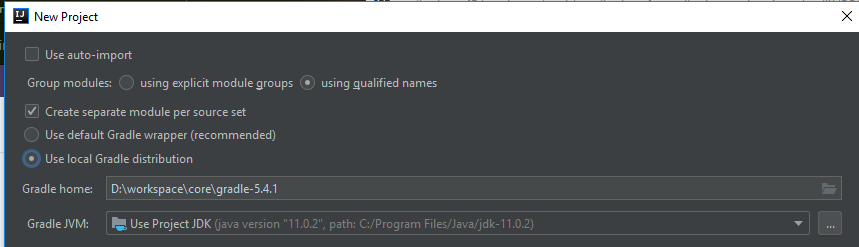
Here you should choose a path to your gradle distribution and jdk. Then just go to the end of the wizard and finish project creation.
Intelij has generated a fresh project for us. We need to set up build.gradle file which contains commands and scripts for our project.
That’s the project tree after I finished it:

Open build.gradle file and put the following code in there:
plugins {
    id 'java'
}


group 'how-tos'
version '1.0-SNAPSHOT'

sourceCompatibility = 1.11

repositories {
    mavenCentral()
}

allprojects {
    repositories {
        jcenter()
    }
    task allProjectMetaTask {
        doLast { task ->
            println "I'm a project: $task.project.name"
        }
    }
}

subprojects {
    version = '2.0'
    task subProjectMetaTask {
        doLast { task ->
            println "I'm a SUBproject: $task.project.name"
        }
    }
}

dependencies {
    testCompile group: 'junit', name: 'junit', version: '4.12'
    compile project(':subproject')
}

apply from: 'tasks/generateFile.gradle'
apply from: 'tasks/deleteFile.gradle'
apply from: 'tasks/credentialGenerator.gradle'
apply from: 'tasks/finalizator.gradle'
apply from: 'tasks/copyDependencies.gradle'
plugins object (eveything is treated her as an object) declares plugins that will be applied in our project. We can choose among the variety of publicy available plugins: https://plugins.gradle.org/ The ‘java’ plugin is one of the most popular ones and contains tasks like ‘compileJava’ or ‘jar’ and sets up java specific project layout. More info on that plugin is here: https://docs.gradle.org/current/userguide/java_plugin.html
group and version objects are clear to understand I think and they were set during project creation phase.
repositories provides repository configuration. We can put there the most pupular ones like mavenCentral(), jcenter() or google() as well as provide our custom ones (like eg. a path to Artifactory or any other custom artifact repository system). More on that matter is to be found here: https://docs.gradle.org/current/userguide/declaring_repositories.html
As you can see I have created a subproject called ‘subproject’ for which I can creati its own tasks. It’s quite useful eg. when our app consists of different modules or microservices which should be managed and build separately. That’s why allprojects and subprojects objects references can be found in my build.gradle file.
All the subprojects have to be included within settings.gradle file by specifying the subproject’s folder name:
rootProject.name = 'gradle-demo'
include 'subproject'
allprojects, as the name suggests, sets up parameters for all projects within current solution. It menas that it concerns the main project ‘gradle-demo’ and its one and only subproject: ‘subproject’. If I run the task allProjectMetaTask it will run against those two projects.
IMPORTANT!
Your local gradle distribution has to added to the PATH variable. Here’s how to do it: https://gradle.org/install/
So just type in the terminal: gradle allProjectMetaTask and see the output:
> Task :allProjectMetaTask
I'm a project: gradle-demo

> Task :subproject:allProjectMetaTask
I'm a project: subproject
The same applies for subproject object. If you call: gradle subProjectMetaTask, on the other hand, you will get:
> Task :subproject:subProjectMetaTask
I'm a SUBproject: subproject
…as there’s only one subproject (called ‘subproject’ :)). Notice that I have set a different repository for that one: jcentet() – all subprojects will be using jcenter() to resolve its dependencies.
Speaking of dependencies, the dependencies object sets up a set of dependencies for each configuration, eg. compile, testCompile etc. more on that matter: https://docs.gradle.org/current/userguide/declaring_dependencies.html
Gradle resolves given dependency from provided repository and downloads all the transitive libraries as well (dependencies of the dependencies).
Here is the standard one junit library and the other one that points to the subproject, so I can use classes declared within it.
Last declaration block is adds my subtasks to the gradle build. I can write scripts in separate files and add them with apply from: ‘PATH_TO_FILE’ method.
Each subproject should have its own build.gradle file. It either can be empty or configure project specific features.
subproject/build.gradle
plugins {
    id 'java'
}

dependencies {
    compileOnly 'org.projectlombok:lombok:1.18.8'
    annotationProcessor 'org.projectlombok:lombok:1.18.8'
}
As you can see, my subproject needs its own dependencies. This can be provided either via main build.gradle file or via project specific one – just like I did that. Lombok annotation processor will be used to quickly create Dog POJO with no wasting our time on writing boiler plate code.
Dog.java
package com.rocketzki.model;

import lombok.AllArgsConstructor;
import lombok.Data;
import lombok.ToString;

@ToString
@Data
@AllArgsConstructor
public class Dog {
    private String name;
    private int age;
}
This class is referenced in our main class:
TheApp.java
package com.rocketzki;

import com.rocketzki.model.Dog;


public class TheApp {
    public static void main(String[] args) {

        Dog dog = new Dog("Mike", 1);
        System.out.println(dog);
    }
}
The Dog class is ‘visible’ for TheApp class thanks to the dependency I put in the main build.gradle file: compile project(‘:subproject’)
TheApp class is not visible for the Dog class as there’s no such need. Also the Lombok library is not visible for TheApp class as it doesn’t need that. Gradle dependency management encapsulates dependencies so we can keep order in our project.
Last but not at least – other .gradle files I mentioned before:
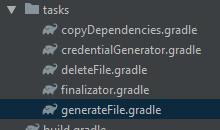
Let’s talk about gradle tasks.
I have prepared set of tasks which explain basic gradle task features in a simple and convenient way.
tasks/generateFile.gradle
task generateFile {
    dependsOn('deleteFile')
    finalizedBy('finalizazator')
    doLast {
        File theFile = new File('theFile.txt')

        println 'Executing generateFile task...'
        theFile.write('File written by the gradle task ')
    }
}
I’m creating a task called ‘generateFile‘ which depends on task called ‘deleteFile‘ – the other one will be executed first. Then it’s set to be finalized by task ‘finalizator‘. doLast closure ensures that the code block is executed in correct order.
tasks/deleteFile.gradle
task deleteFile {
    doFirst {
        println 'Executing deleteFile task...'

        File theFile = new File('theFile.txt')

        if (theFile.exists()) {
            println 'The file exists - deleting file...'
            theFile.delete()
        }
    }
}
This task removes the text file before it’s generated. ‘generateFile‘ task depends on it so it’s executed beforehand. the doFirst closure ensures that the given code block is executed as a first.
tasks/finalizator.gradle
task finalizazator {
    doLast {
        printNiceTree()
    }
}

def printNiceTree() {
    println """  .       /\\\\/%\\       .   /%\\/%\\     .
      __.<\\\\%#//\\,_       <%%#/%%\\,__  .
.    <%#/|\\\\%%%#///\\    /^%#%%\\///%#\\\\
      ""/%/""\\ \\""//|   |/""'/ /\\//"//'
 .     /'`   \\ \\  `    "   / /  ```
        `      \\ \\     .   / /       .
 .       .      \\ \\       / /  .
        .        \\ \\     / /          .
   .      .    ..:\\ \\:::/ /:.     .     .
______________/ \\__;\\___/\\;_/\\________________________________
YwYwYwYwYwYwYwYwYwYwYwYwYwYwYwYwYwYwYwYwYwYwYwYwYwYwYwYwYwYwYw"""
}
‘finalizator‘ task calls a method printNiceTree() which is called after the ‘generateFile‘ task finishes its work.
We can also pass our custome parameters o our gradle tasks! It’s easy, just take a look at ‘credentialGenerator‘ task.
tasks/credentialGenerator.gradle
task credentialGenerator {
    doLast {
        println 'your credentials: ' + login + ":" + pass
    }
}
Variables: login and pass aren’t declared anywhere. That’s why we should pass them via command line putting -P prefix before each one: gradle credentialGenerator -Plogin=rocketzki -Ppass=thePassword1!
Output:
> Task :credentialGenerator
your credentials: rocketzki:thePassword1!
What happens if we don’t provide any values for those variables? Gradle will throw an exception of course:
* What went wrong:
Execution failed for task ':credentialGenerator'.
> Could not get unknown property 'pass' for task ':credentialGenerator' of type org.gradle.api.DefaultTask.
The last task I’ve prepared is ‘copyDependencies‘
tasks/copyDependencies.gradle
task copyDependencies(type: Copy) {
    from configurations.compile
    into 'dependencies'
}
It creates task of type Copy. It means that it returns as an instance of Copy object with parameters given in the closure: from and into paths. By calling this task we copy all dependencies from the cinfugiration called ‘compile’ to the ‘dependencies‘ folder. Since we have only one dependency provided for ‘compile’ configuration we get only one library as a result:

Notice that it has version 2.0 – just like I’ve set it in the main build.gradle file under subprojects closure.
That’s it when it comes to the basics. Gradle is a really powerfull tool used by professionals and amateurs. I recommend checking out its docs – it’s really cool and informative.
Here’s the link for full code repo
Should you have any questions don’t hesitate contacting me, code your best.
[…] This is a simple Spring Boot app powered by Gradle project tool so you need to create a project first. You can read more about it in my other articles (Spring Boot, Gradle) […]
[…] structure looks like this. It’s created in Gradle. Click here to find out how to manage Gradle […]